
Intro to video editing — in Scenery

Piecing together your first video in a video editing tool can be intimidating if you’re new to the space, but Scenery makes it easy to get started and bring your team along with you.
For those new to video editing, Scenery is an approachable yet powerful online video editor that makes it easy to make completely custom videos — and even easier to collaborate with your team along the way.
In this post, we’ll provide you with a high-level introduction to editing your first video in Scenery so you can get up and running faster. Here’s what we’ll cover:
- Inviting your team. If you’re working in a team, you can invite them to edit with you in a shared dashboard and real-time multiplayer video editing workspace.
- Importing your media. Whether you’re creating new video on the fly or bringing in videos from somewhere else, this is the first step to piecing together your video.
- Brainstorming and ideation in the Canvas. Visually browse and categorize your media in a video whiteboard space to prepare for your edit.
- Editing and fine tuning in the Timeline. Arrange your clips in order, add visual layers, trim and cut to control timing, and add your final polish.
- Gathering feedback and getting approvals. Share your video with collaborators or teammates for review and feedback.
- Exporting and publishing. When you’re ready to go, take your video and adapt it for your different outputs, then export to share them with the world.
Inviting your team to edit videos with you
If you’re working with a team, you know all too well how many different people are involved in video creation — from marketing and creative teams to video editors and production, all the way down the line to your social media and distribution teams.
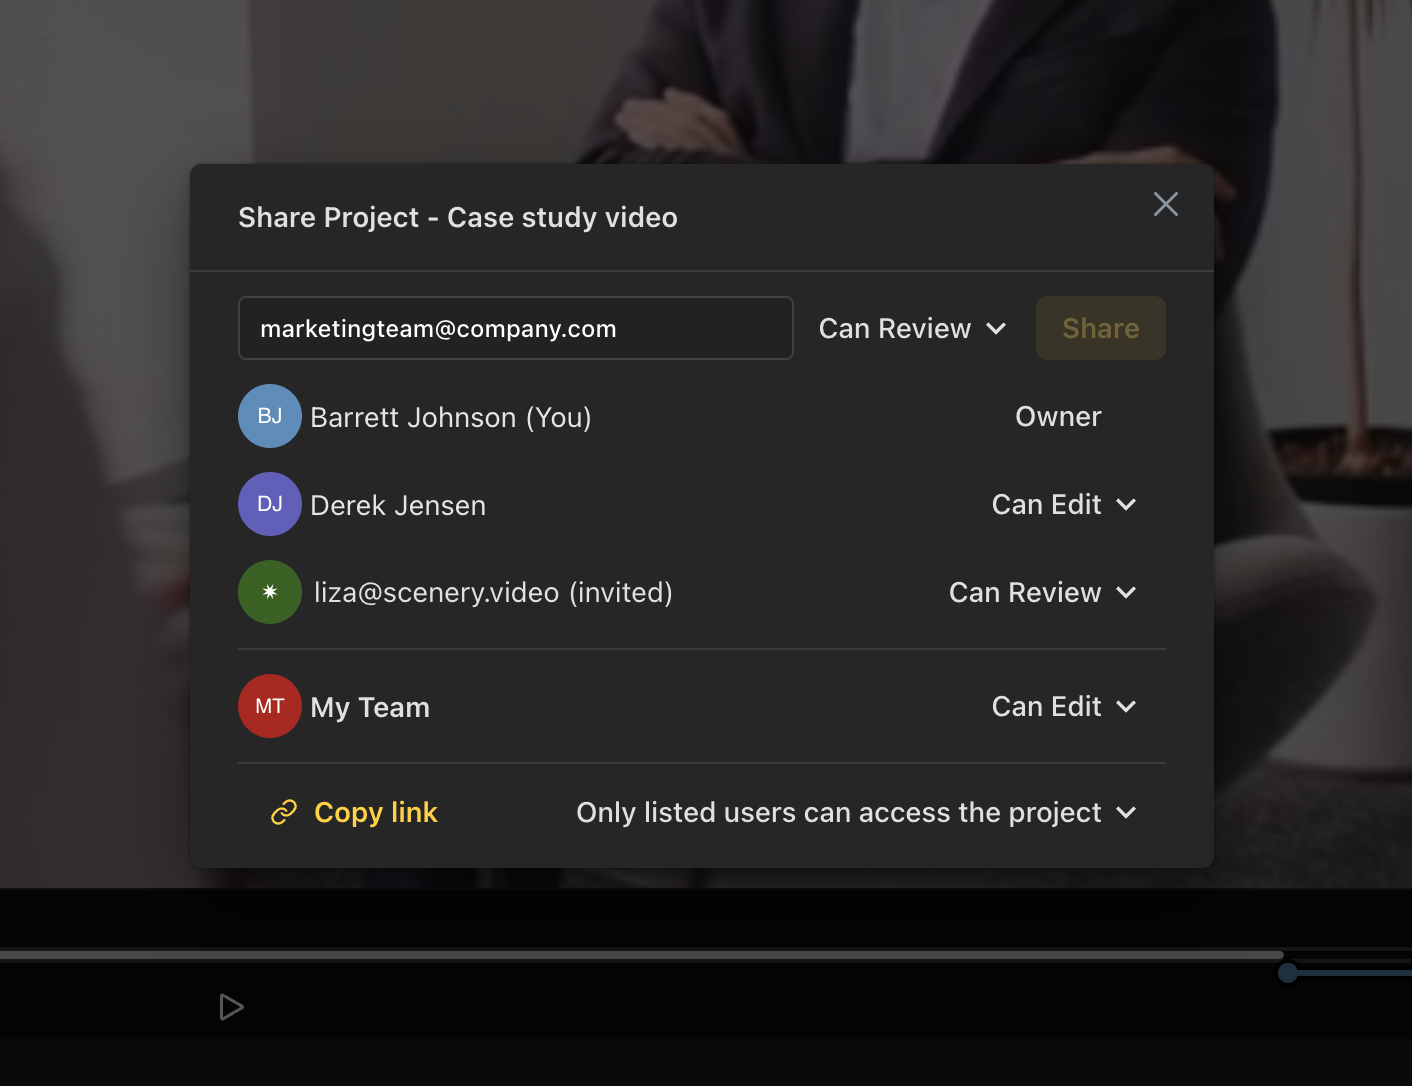
Thankfully with Scenery, you can invite all these folks into Scenery to work together on videos, upload media, ensure everyone can see what projects are in flight, and grab the assets they need, when they need them.
Importing your media
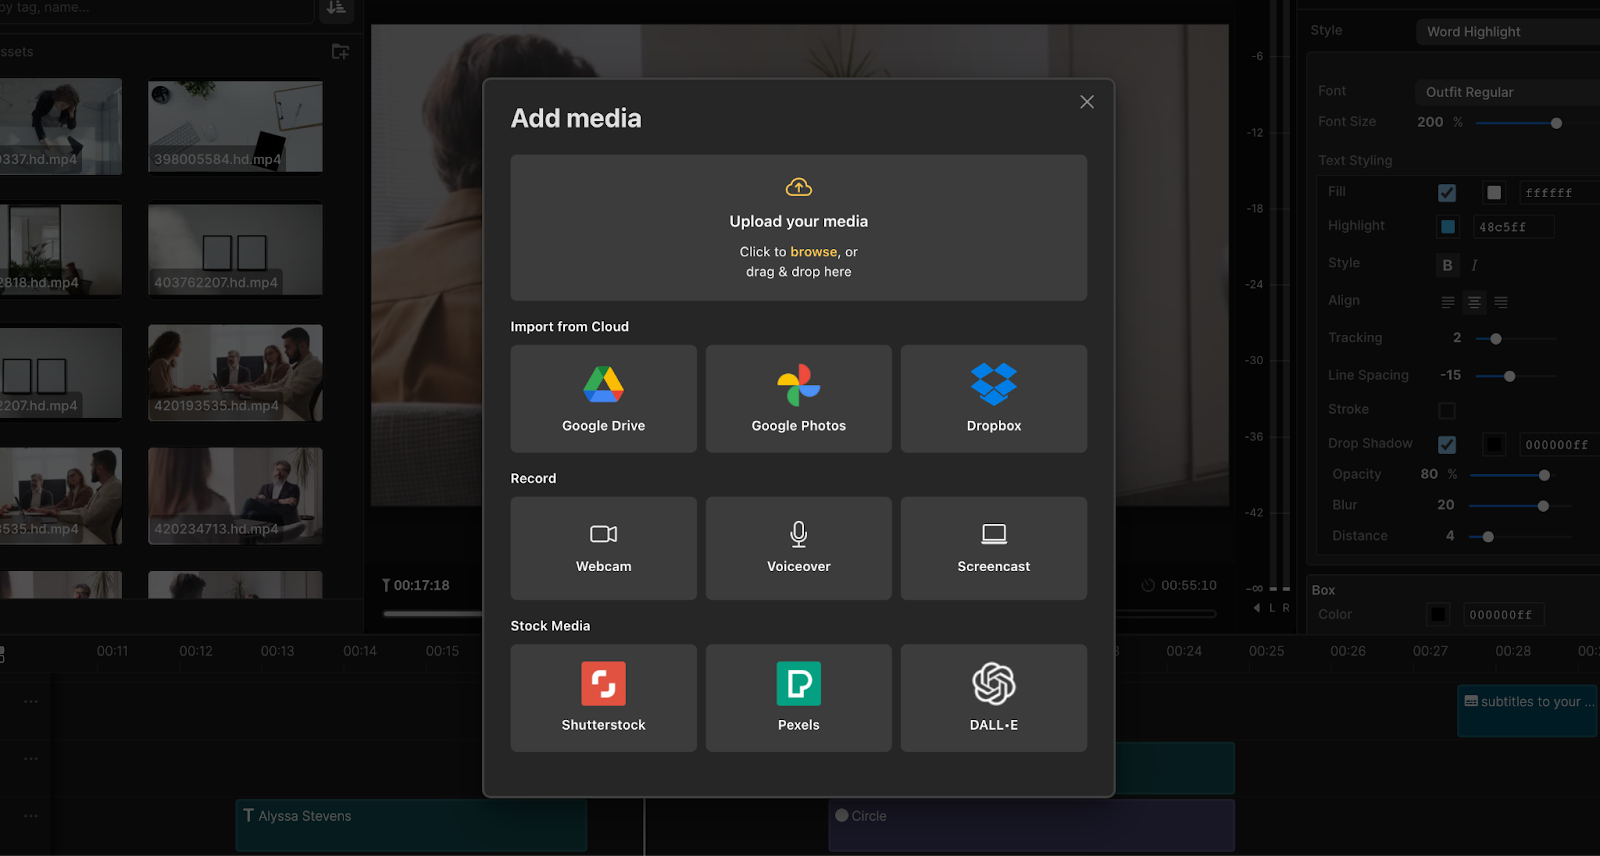
Whether you have an existing library of videos that you want to bring into Scenery or you need to create (or even search for) some video to work with, we’ve got you covered. You’ve got a range of options to choose from when importing media to Scenery:
- Direct upload from your computer. Upload existing audio, video, image, Lottie, and other files directly from your computer.
- Cloud storage sources. Connect your Dropbox or Google Drive accounts and select which folders or files you want to import.
- Stock video & music. Search across Shutterstock (music, video) and Pexels (video) for free stock footage to use in your projects.
- Screencast recording. Record your screen to create demo videos or tutorials.
- Voice recording. Directly create and import audio recordings.
- Webcam recording. Record directly from your webcam and import.
- AI-generated images. Use DALL-E to generate images based on text prompts.
(Bonus: once your media is in Scenery, you can organize everything with tags, transcripts, comments, folders, and more — all in a collaborative dashboard that your whole team can access.)
To learn all there is to know about managing and uploading assets in Scenery, check out our help center article.
Brainstorming and ideation in the Canvas
If you are approaching an edit fresh, and haven’t yet determined exactly how all your media is going to come together, Scenery’s video whiteboard Canvas can be a great place to start.
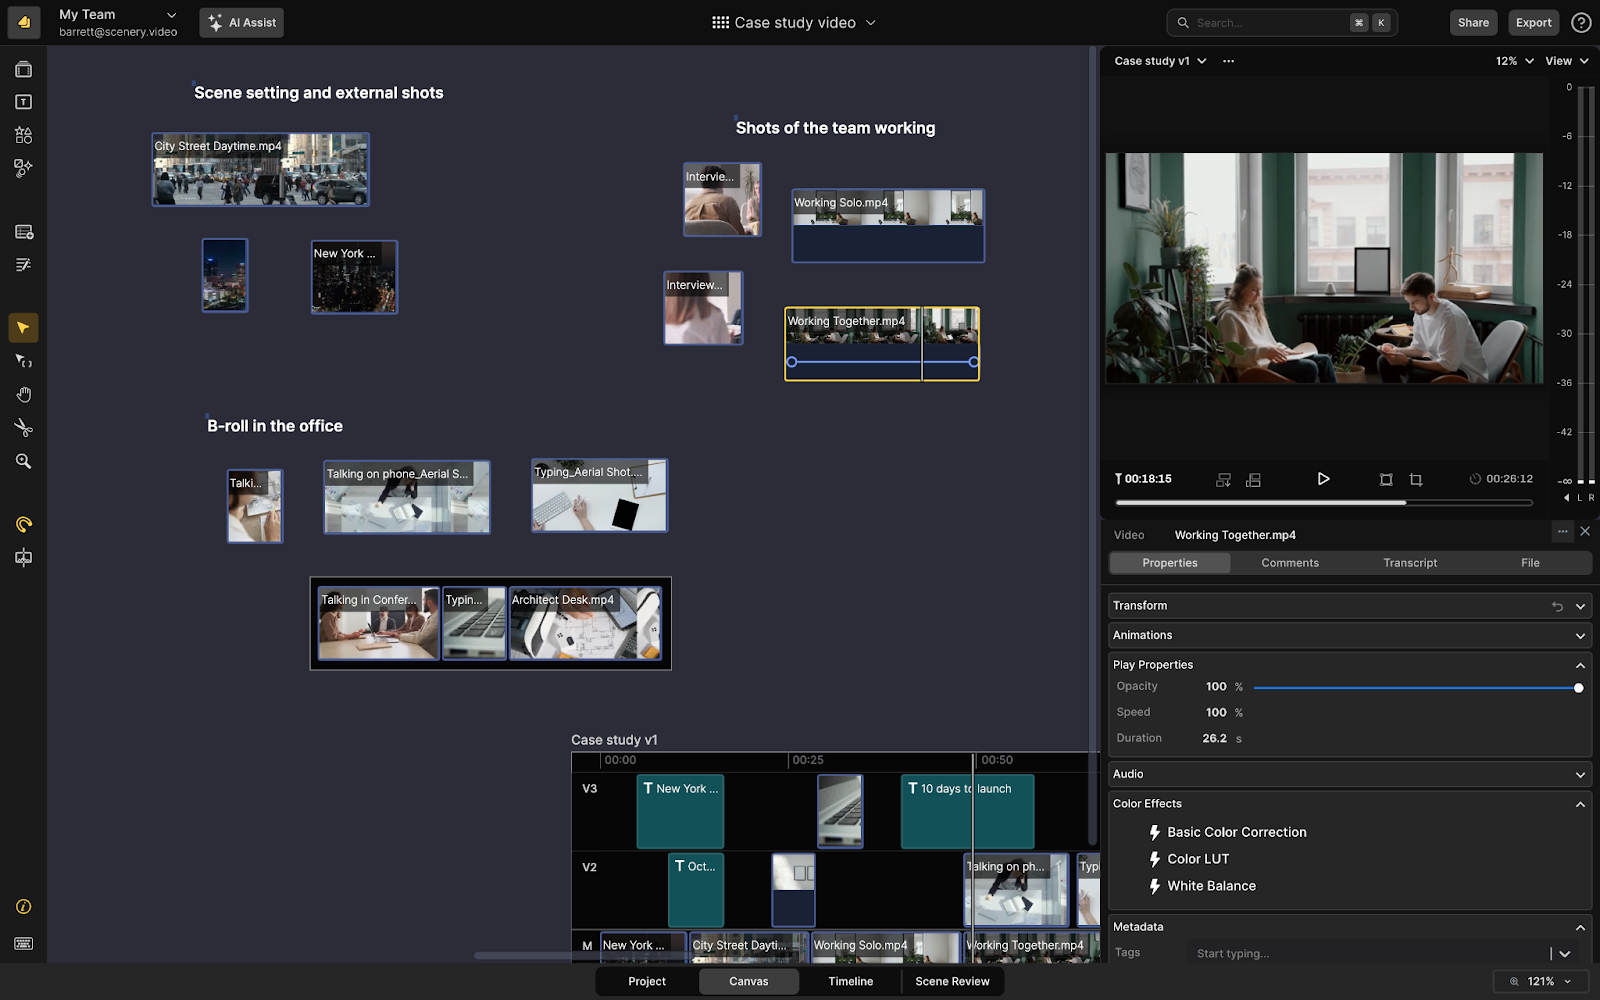
Within the Canvas, you can visually organize and arrange all your different media types in one place and think through which clips should make it into your final edit.
This can also be a great place to start brainstorming and ideation with the broader team or gather inspirational materials for a video moodboard to provide guidance as you edit.
To learn more about the Canvas, check out our help center article.
Editing and fine tuning in the Timeline
The Timeline is where you’ll spend most of your time, and is the area within Scenery that will feel most familiar to those of you who have worked with timeline-based video editors (also known as “non-linear editors” or “NLEs” for short) in the past.
The Timeline is where you bring your video to life, working with different tracks for video, images, audio, text, shapes, and more, with each track representing a sequence of items to be shown (or in the case of audio, played) over the course of the video.
Some of the most crucial and common jobs you’ll do within the Timeline include:
- Trimming and cutting to determine the start and end of each piece within your video
- Adding titles, logos, and shapes as additional visual layers on top of your video
- Applying transitions, animations, and effects to control how clips appear
- Fine tuning video playback speed, volume, color, and positioning
- Adjusting audio track volume, fades, and more
- Adding intro and outro segments
- Adapting your video for different formats and sizes
- And much much more…
For a closer look at all the controls and edits you can do in the Timeline, check out out detailed help center article.
Gathering feedback and getting approvals
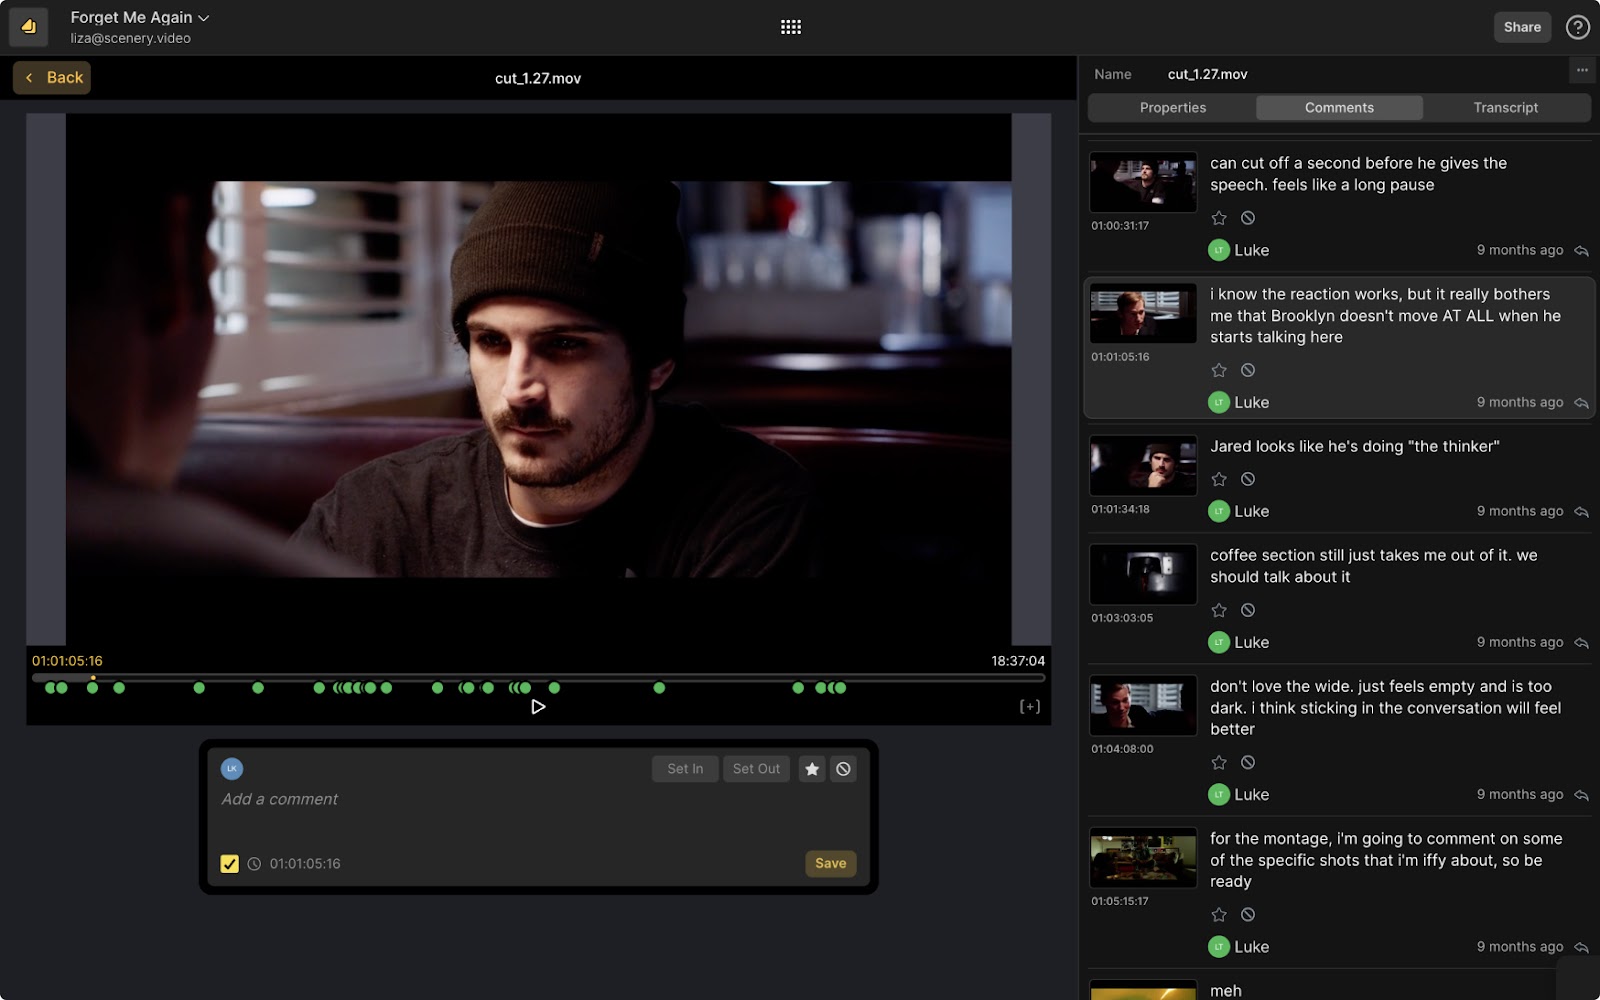
Once you have an edited scene that feels ready for a second pair of eyes, you can share a review link for your teammates that they can immediately access — no need to wait for your video to render and export. Teammates can leave time-stamped comments throughout the video, which you’ll then see right in the Timeline where you edit, and you can immediately make updates for them to approve and see on their end.
For more specific instructions on how to share a scene for review, check out our help center article.
Exporting and publishing
Once you’re all set and ready to share your video with the world, you have a few options for exporting from Scenery:
- Publish your video directly to Youtube
- Export and download to your computer
- Export XML and clips to Adobe Premiere Pro for final touches
Pro tip: your exported videos will land in an “Exports” folder for the project, and you can share these final exports via a review link for your teammates if you need to do a final full resolution review and approval.
There’s a ton more to export within Scenery, but this should help get you started. Best of luck on your edit, and if you have any questions or need our help you can shoot us a note at help@scenery.video or invite us to help out in your next project.
